For the first time ever The Classy Alcoholic is opening up the doors of the blog in order to host a guest. My friend Michele Buttrum is a fellow beer lover who also makes some retail store-worthy home decor from scratch using only the tools in her garage and a glass of craft beer by her side. I’ve seen her projects in person so I thought I’d give her a chance to share her process with everyone. Take it away, Michele!

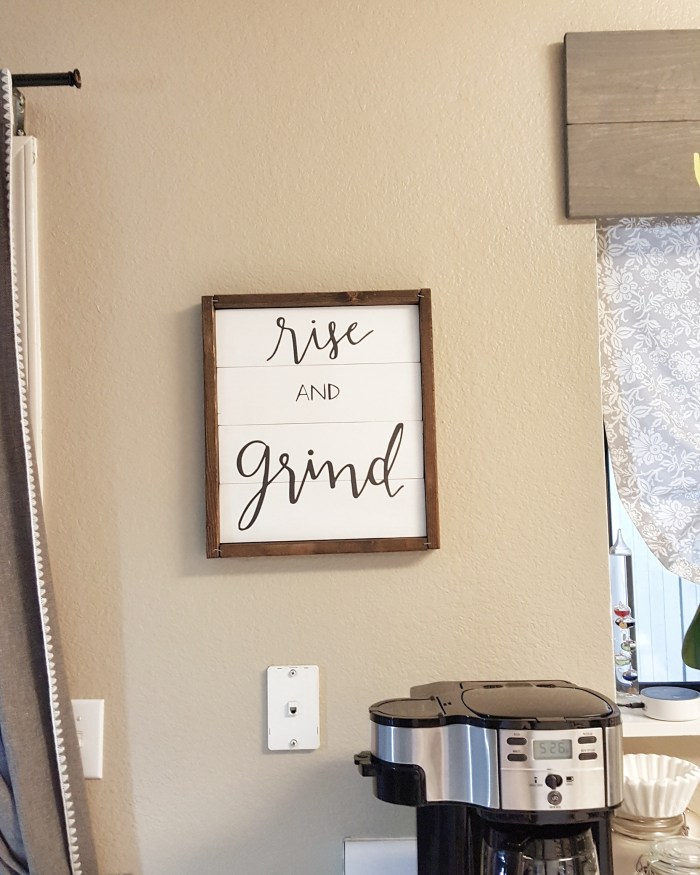
I knew I wanted a sign on the empty wall above my coffee pot but I needed to find the perfect quote for it.
- Black, like my soul
- I pretend coffee helps but I’m still a bitch
- Rise and grind
Although those two first options are completely true, I thought “rise and grind” was a bit more motivating (and in-law approved)!
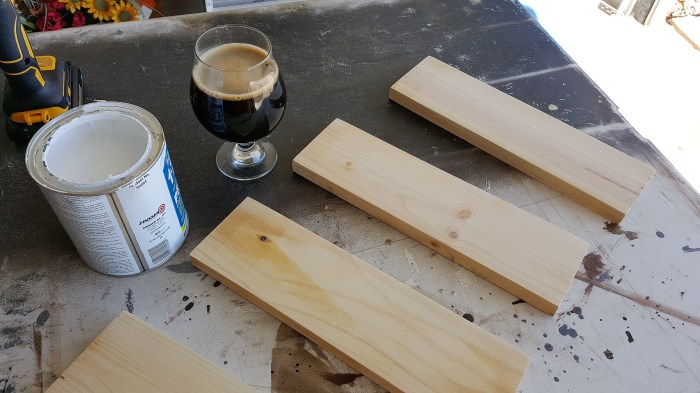
For this sign, I decided to create my first farmhouse style sign. You know, the Chip & Joanna Gaines-inspired cult thing that’s all the rage now. I ventured out to the garage to see what I could put together. I found (4) 1 x 4’s that were all cut the same length from a previous project. Score! I also had one piece of 1 x 2 that was long enough to become my frame.
Supplies list:
Scrap wood or wood cut to the size you want
Miter saw
Orbital sander or sand paper
Drill bit
Varying grit sand paper
Paint color of choice – I used Rust-Oleum Zinsser white primer
Wood stain of choice – I used Minwax Dark Walnut
Paint brush and/or roller
Staining cloth – I use old cotton shirts
Kreg Jig & wood screws
Wood glue
Stapler gun – optional
Vinyl – optional
Metal corner braces – highly recommended
Sawtooth hanging bracket
2000’s country radio – optional
Craft beer – not optional
Gather your supplies.

Notice that beautiful blue label on that beer bottle? That right there is my favorite craft beer. Yup, I’m a beer girl. Let me clarify – I’m a craft beer girl! And I want you to appreciate craft beer as well. You know why? It’s simple, really. See the word craft, well that’s what you’re reading this for right? You want to craft or create something. Well, making craft beer is someone’s passion and someone’s craft, and I think creating great things while drinking great things go hand in hand.
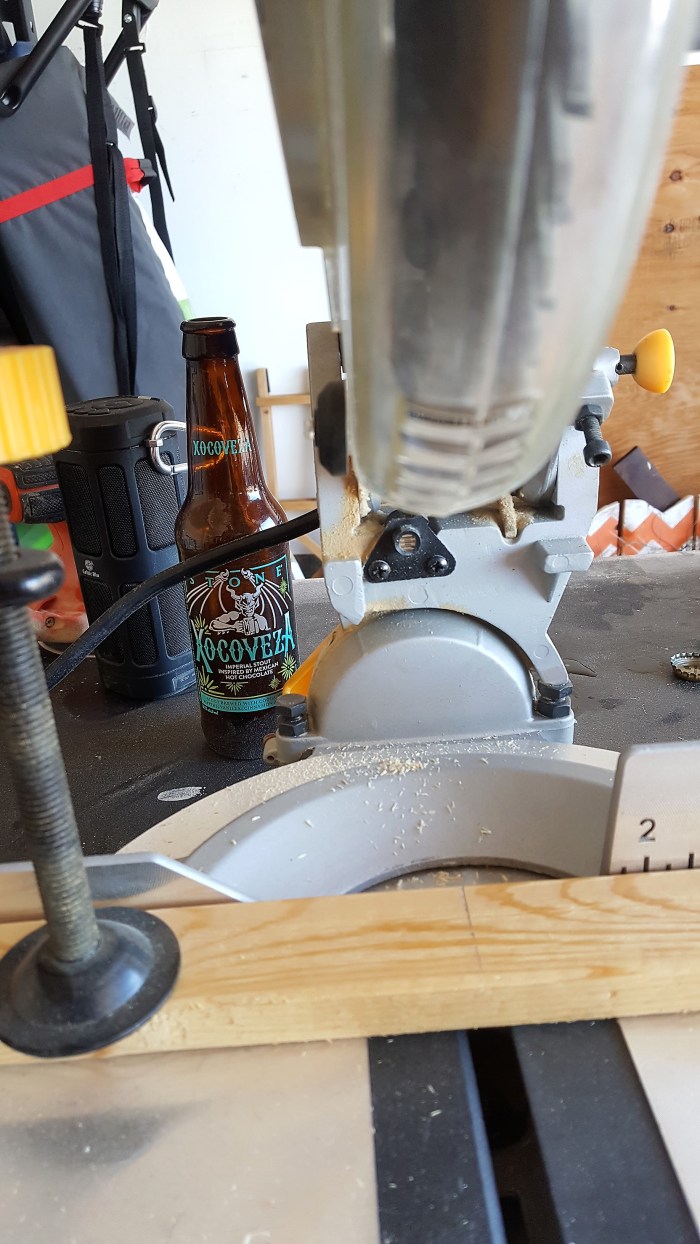
Today’s craft beer joining us on our project is Xocoveza by Stone Brewing.
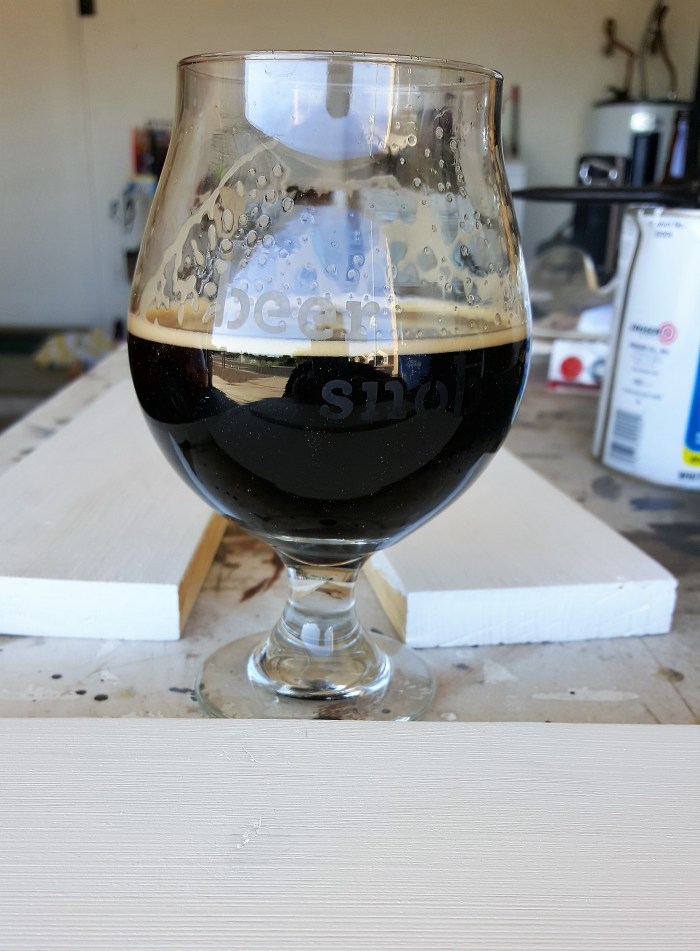
I asked Alexa (because I’m a millennial and opening music apps on my phone is too hard) to play me some 2000’s country and poured my delicious beer into a glass and got started. I used one of my favorite beer glasses, by the way. Etched in it is “beer snob” because, well, beer > wine. You’ll be able to see the etched wording in some of the pictures.
I prepared my 1 x 4’s for painting and sanding by using my orbital sander. I used two different grits, 80 to 150, to ensure my wood was smooth to the touch. With sand paper, you want to start at a lower grit and move to a higher grit to remove the imperfections in the wood.
Next, I took some sips of that delicious goodness sent from above. Xocoveza beer is described as a Mocha Stout. Um yum! Cool story about this beer is it won a homebrewer competition hosted by Stone Brewing and became bottled. This beer was supposed to be a one-time thing, but it ended up with a cult following! It’s that good!
After sanding and cleaning away the dust on the 1 x 4’s the next step was to paint. I used a 2-inch paint brush and put on a couple light coats of Rust-Oleum Zinsser white primer.
Oh man, check out that beauty! You can also see my Christmas present, a new DEWALT drill. Love it!

You know what’s the best thing to do when you’re waiting for paint to dry? Drinking a cinnamon, chocolate, nutmeg, peppery, coffee delicious beer while listening to Taylor Swift tell you about the teardrops on her guitar! Where my basic bitches at?!
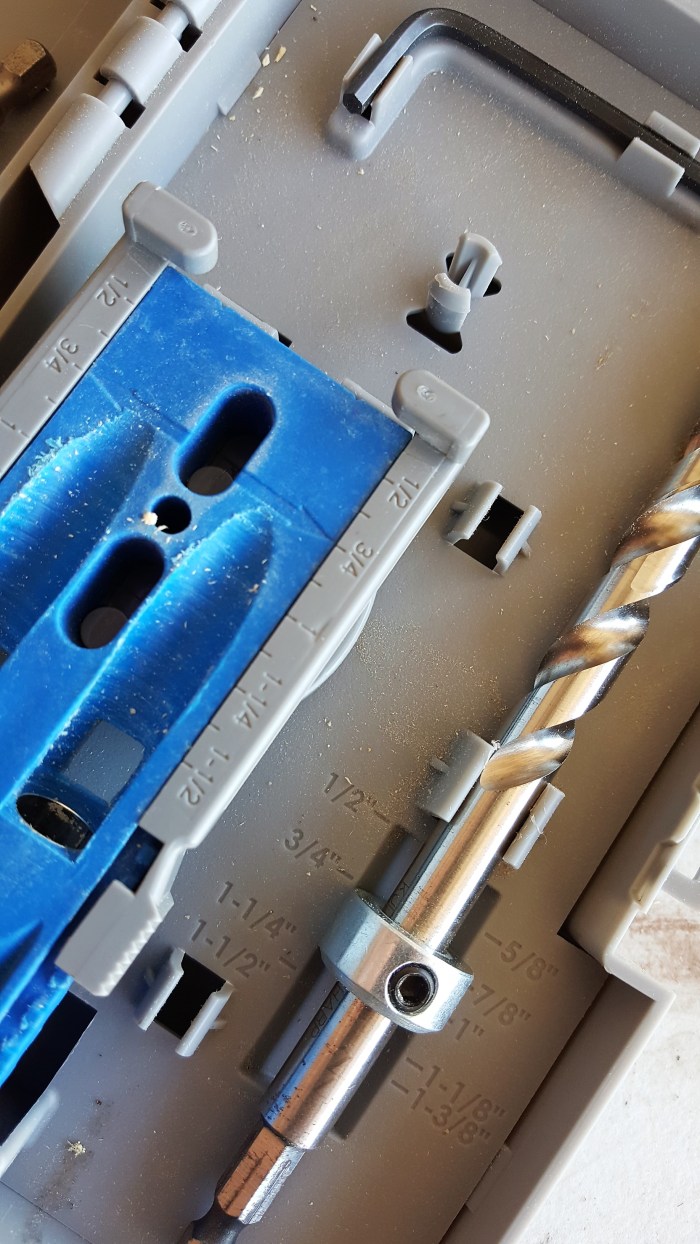
When the paint was mostly dry, I flipped over my white 1 x 4 boards and laid them on top of a towel to protect the paint as I drilled pocket holes into the back. I used my Kreg Jig, wood glue, and Kreg screws to attach the boards together. Using a Kreg Jig is superrrr easy and makes joining wood a breeze! There are two components to the Kreg Jig for creating pocket holes – a hole maker and a drill bit. You line up the arrows on the hole maker to the thickness of your wood and you do the same for the ring on the drill bit. Both are set at ¾” – the thickness of my 1 x 4’s. Easy peasy!
Now that I had my white boards attached to each other, I could then measure the lengths of my 1 x 2’s to create the frame. I did not miter these cuts, but you certainly can to create nice corners. I felt that since I was going for a farmhouse look, that square cuts would look better. I gave these boards just a light sanding because I wanted to keep them rustic looking.
The sign is taking shape!

I stained the 1 x 2’s with Minwax Dark Walnut. For staining, I just use an old cotton T-shirt. There’s no need to get fancy with a staining sponge!

Did I mention it’s 11 am on a Friday and I’ve already finished my beer? Can you say, “breakfast beer”!!! But it’s okay though, it was like I just finished drinking a Mexican hot chocolate (with alcohol). No biggie!
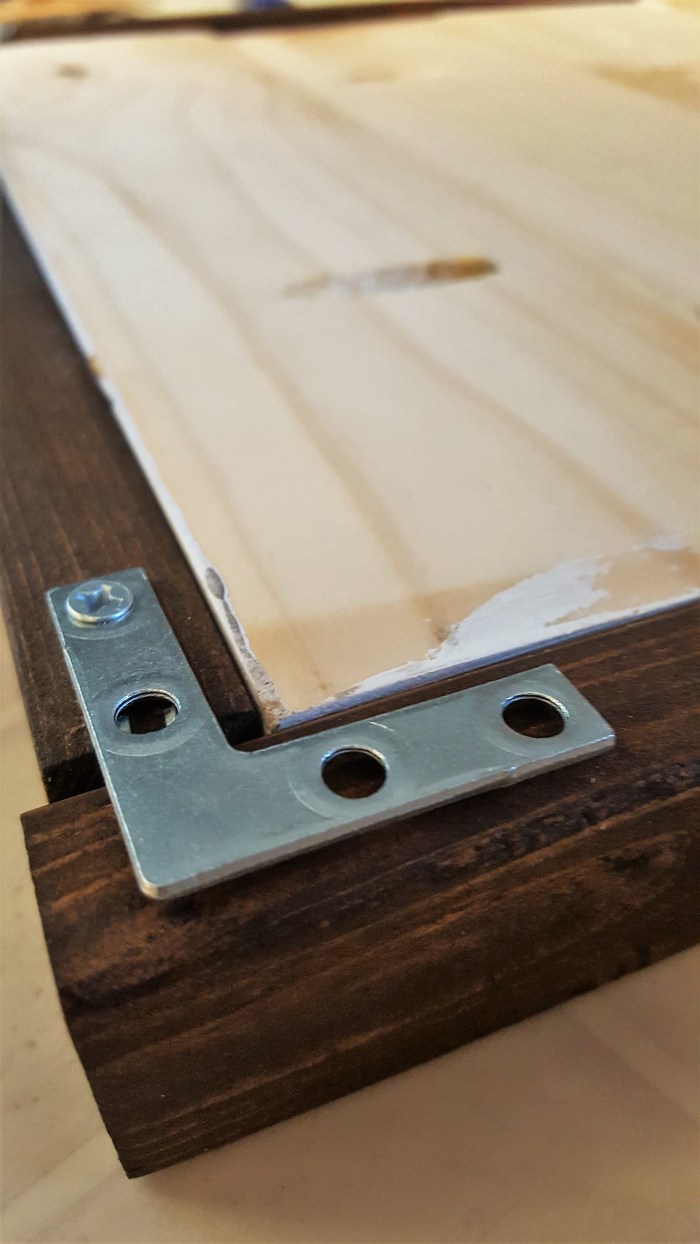
I decided to use my stapler to add a staple to each corner of the frame to give a more rustic look. This step is completely optional. The staples I used were not large enough to securely hold the frame together and are there for decoration purposes only. To secure the corners of the wood frame around the white boards, I attached metal corner brackets to the back and also used wood glue at the corners. Using these brackets created a secure fit around the white boards. I did not do anything to attach the white boards to the frame because the corner brackets made everything fit snugly. I added one sawtooth hanger with finishing nails on the back of the upper frame so it can hang on the wall.

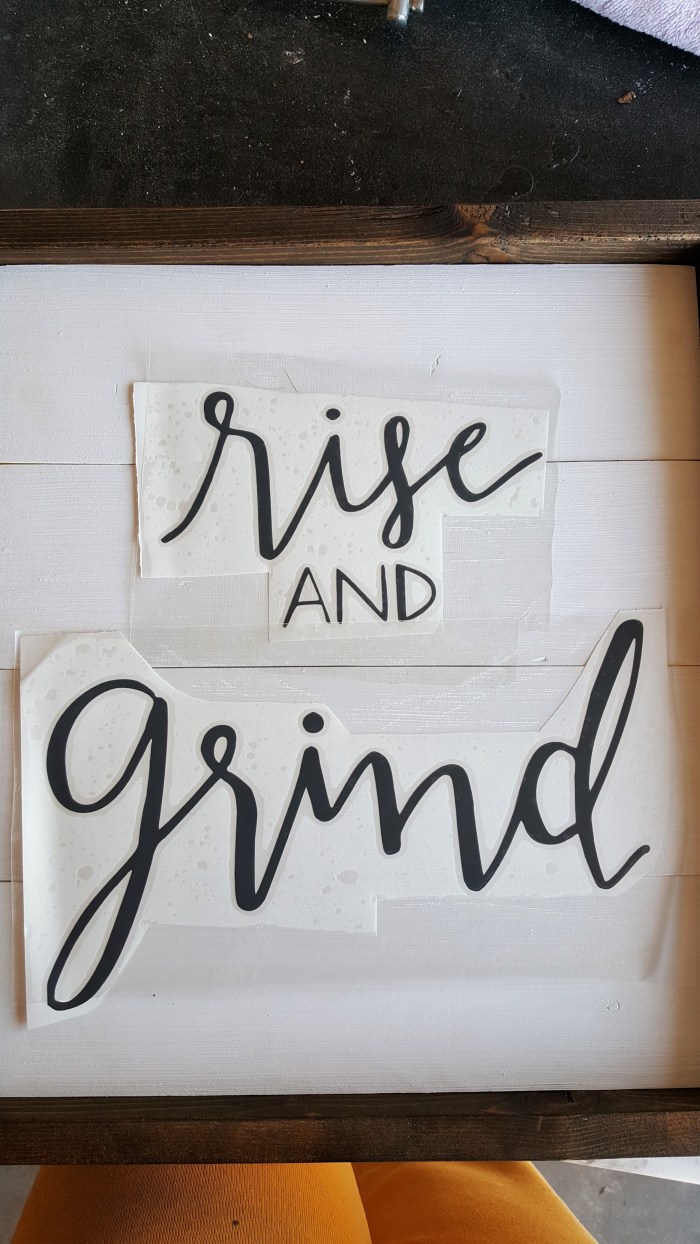
For the text, I decided to go with a dark gray vinyl to match my kitchen. I used my Cricut machine to cut out the text. After I decided on the placement, I transferred the vinyl to the board by rubbing it firmly with a tennis ball to ensure the vinyl was sticking fully to the wood.
And there you have it! My completed farmhouse sign for my kitchen! If you have the space, I think it would look nice leaning against a wall in a coffee bar area. Oh, and let’s not forget to give Xocoveza a try! If you are unsure of where to find it, you can visit Stone Brewing’s website to find their beer in your location. You won’t be disappointed with the chocolate and coffee flavors that will invade your mouth with a teensy tiny bit of spice! Think of the best Starbs drink you ever had and multiply that by ten!
Follow me on Instagram to see what I’m drinking, what I’m creating, and where I’m biking!
